Introduction
The Lenovo ThinkCentre M920x Tiny is a compact, power-efficient business desktop with an 8th-generation Intel CPU, a PCIe x16 slot (wired at x4), and an M.2 A+E slot. Second-hand units regularly sell for $80–$150, making it an excellent base for a home or small-office NAS at a fraction of the power and cost of a purpose-built unit.
The problem is the chassis. The stock M920x enclosure is designed for its original slim profile and has no room for a SAS controller, a PCIe riser, or drive bays. This build solves that with a complete set of custom 3D-printed PETG parts that replace the top shell entirely — extending the usable volume to fit all the hardware while maintaining a rigid, enclosed structure with proper airflow.
The result is a 12Gbps SAS-capable NAS running TrueNAS Community Edition, in a footprint roughly the size of a thick hardcover book.
Prerequisites
- Lenovo ThinkCentre M920x Tiny — any CPU config works; more RAM (16GB+) is better for ZFS
- A 3D printer — capable of PETG; 0.4mm nozzle and standard settings are sufficient
- PETG filament — heat-resistant and strong enough for an active enclosure
- Basic tools — Torx T8, Phillips screwdrivers, wire stripper, crimping tool, soldering iron, wires
- A separate machine — to flash TrueNAS and manage the NAS via browser
- A USB drive (8GB+) — for the TrueNAS installer
- 2.5" SATA or SAS drives — however many you want to populate
Hardware List
All prices reflect what was paid at time of purchase. Optional items add protection and thermal headroom but are not required for the build to function.
| Component | Price | Link |
|---|---|---|
| Core Components | ||
| Supermicro 9300-8i 12Gbps SAS Controller | $40.35 | Buy → |
| Internal Mini SAS Power / Data Cable | $10.28 | Buy → |
| PCIe Riser Card | $7.62 | Buy → |
| 2.5" Hot-swap Caddy Tray × 3 | $17.37 | Buy → |
| Arctic Fans | $44.99 | Buy → |
| DC 12V 3A 4-Pin Fan Speed Controller | $3.12 | Buy → |
| M.2 A+E Key 2.5G NIC | $14.23 | Buy → |
| Fasteners & Wiring | ||
| Locking Screw | ~$3.00 | Buy → |
| Locking Bolt | ~$3.00 | Buy → |
| M3 30mm Screws | ~$4.00 | Buy → |
| M2.5 8mm Screws | ~$3.00 | Buy → |
| Bolt Pack (assorted) | $9.52 | Buy → |
| Wire Connector Tips (pack) | $5.99 | Buy → |
| Heat Shrink Tubing | $9.06 | Buy → |
| Optional | ||
| Fast-Blow Glass Fuse Assortment Optional | $9.99 | Buy → |
| South Bridge Radiator Optional | $11.16 | Buy → |
| Estimated total (excluding M920x, drives, and filament) | ~$175 | |
3D Printed Parts
The five parts below replace the stock M920x top enclosure entirely. Printed in PETG filament, they extend the internal height of the chassis to fit the PCIe riser, SAS controller, and drive caddies while keeping everything rigid and enclosed. Click any part below to load it in the 3D viewer.
-
PETGFront PanelReplaces the M920x front face. Contains drive bay openings and intake airflow vents.
-
PETGTop ShellMain replacement cover. Raises the profile to accommodate the SAS card and riser at full height.
-
PETGCPU Side PanelSide panel on the CPU/fan side. Includes ventilation cutouts aligned with the Arctic fans.
-
PETGPCIe Side PanelSide panel on the PCIe riser side. Provides structural support and cable routing clearance.
-
PETGSAS BracketMounts the Supermicro 9300-8i at the correct height and angle inside the custom enclosure.
Click and drag to rotate · Scroll to zoom · Right-click to pan
All 3D Print Files
5 PETG parts · STL format
Build Photos
Step 1 — Disassemble the M920x
Power down completely, unplug the power cable, and remove the stock top cover by pressing the release tab on the rear and sliding it off. Undo the Torx T8 screws holding the mainboard tray and slide it out for full access.
Install the M.2 A+E NIC
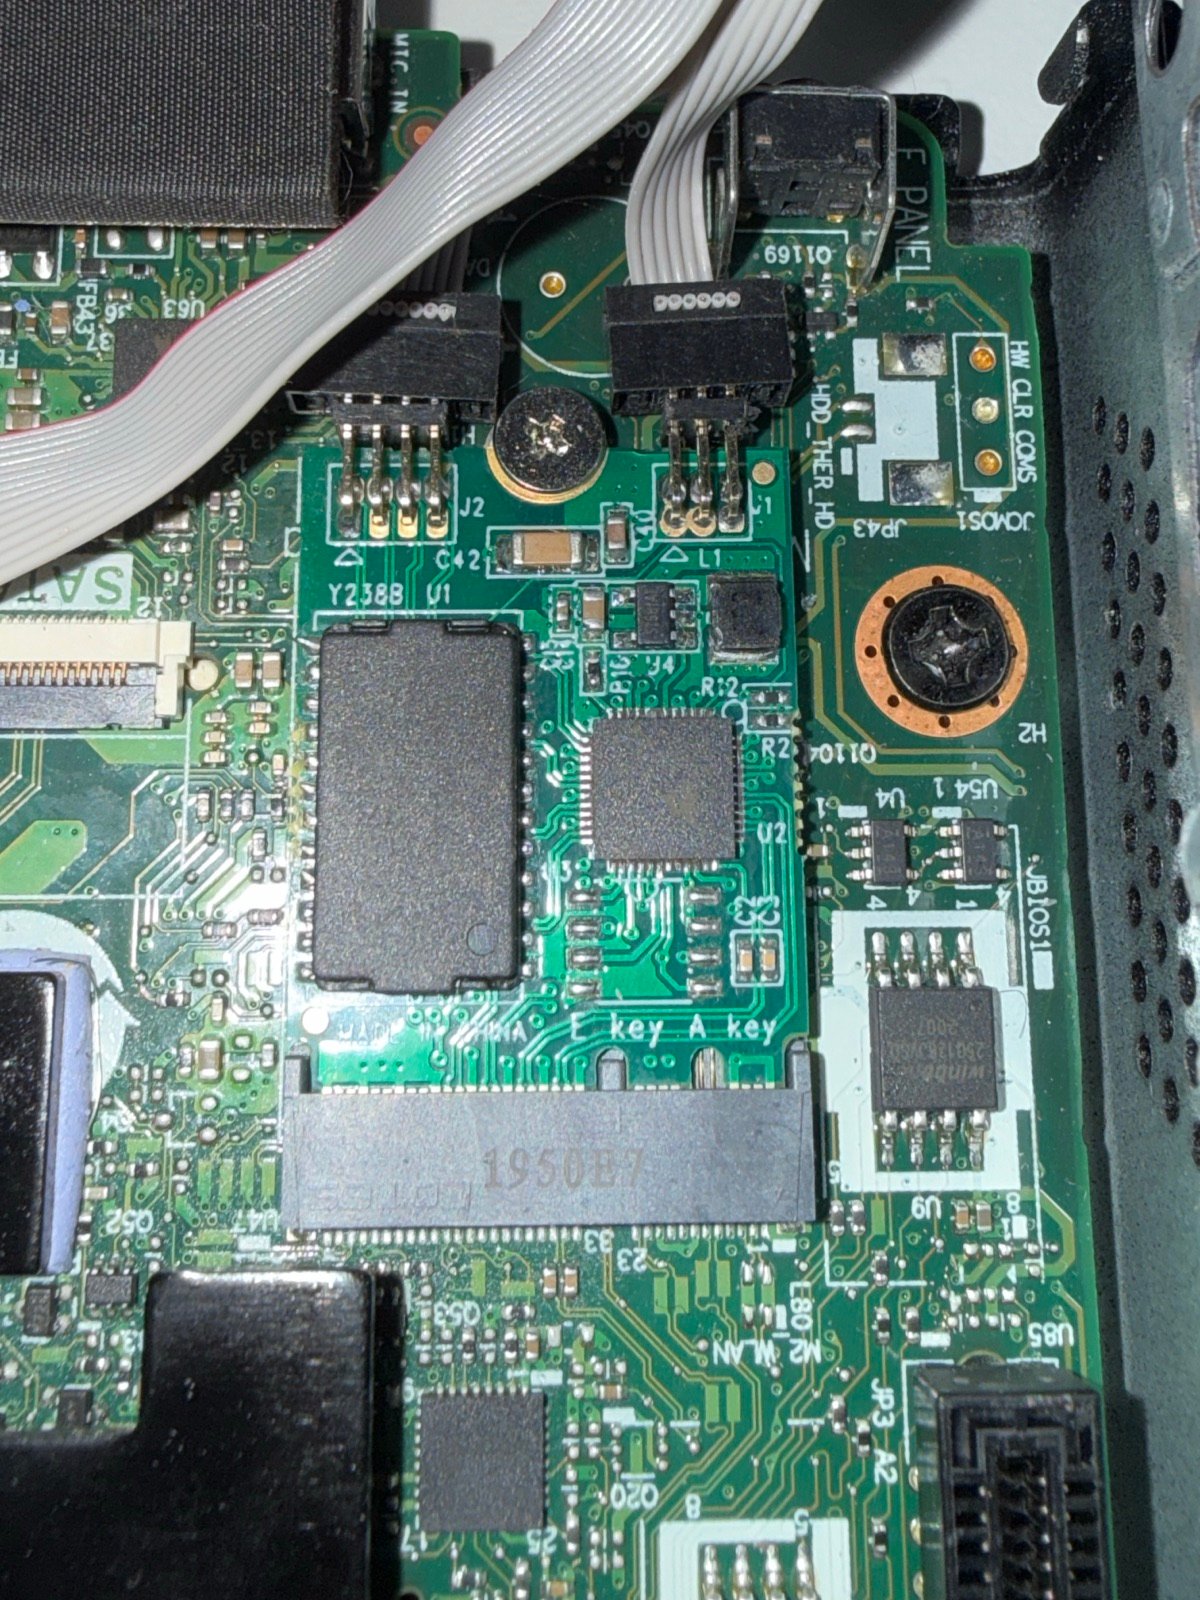
The M920x has an M.2 A+E slot on the mainboard, typically used for WiFi. Seat the 2.5G NIC module here and secure it with an M2.5 8mm screw. This gives the NAS a 2.5Gbps interface without occupying the PCIe slot.
Solder the power wires
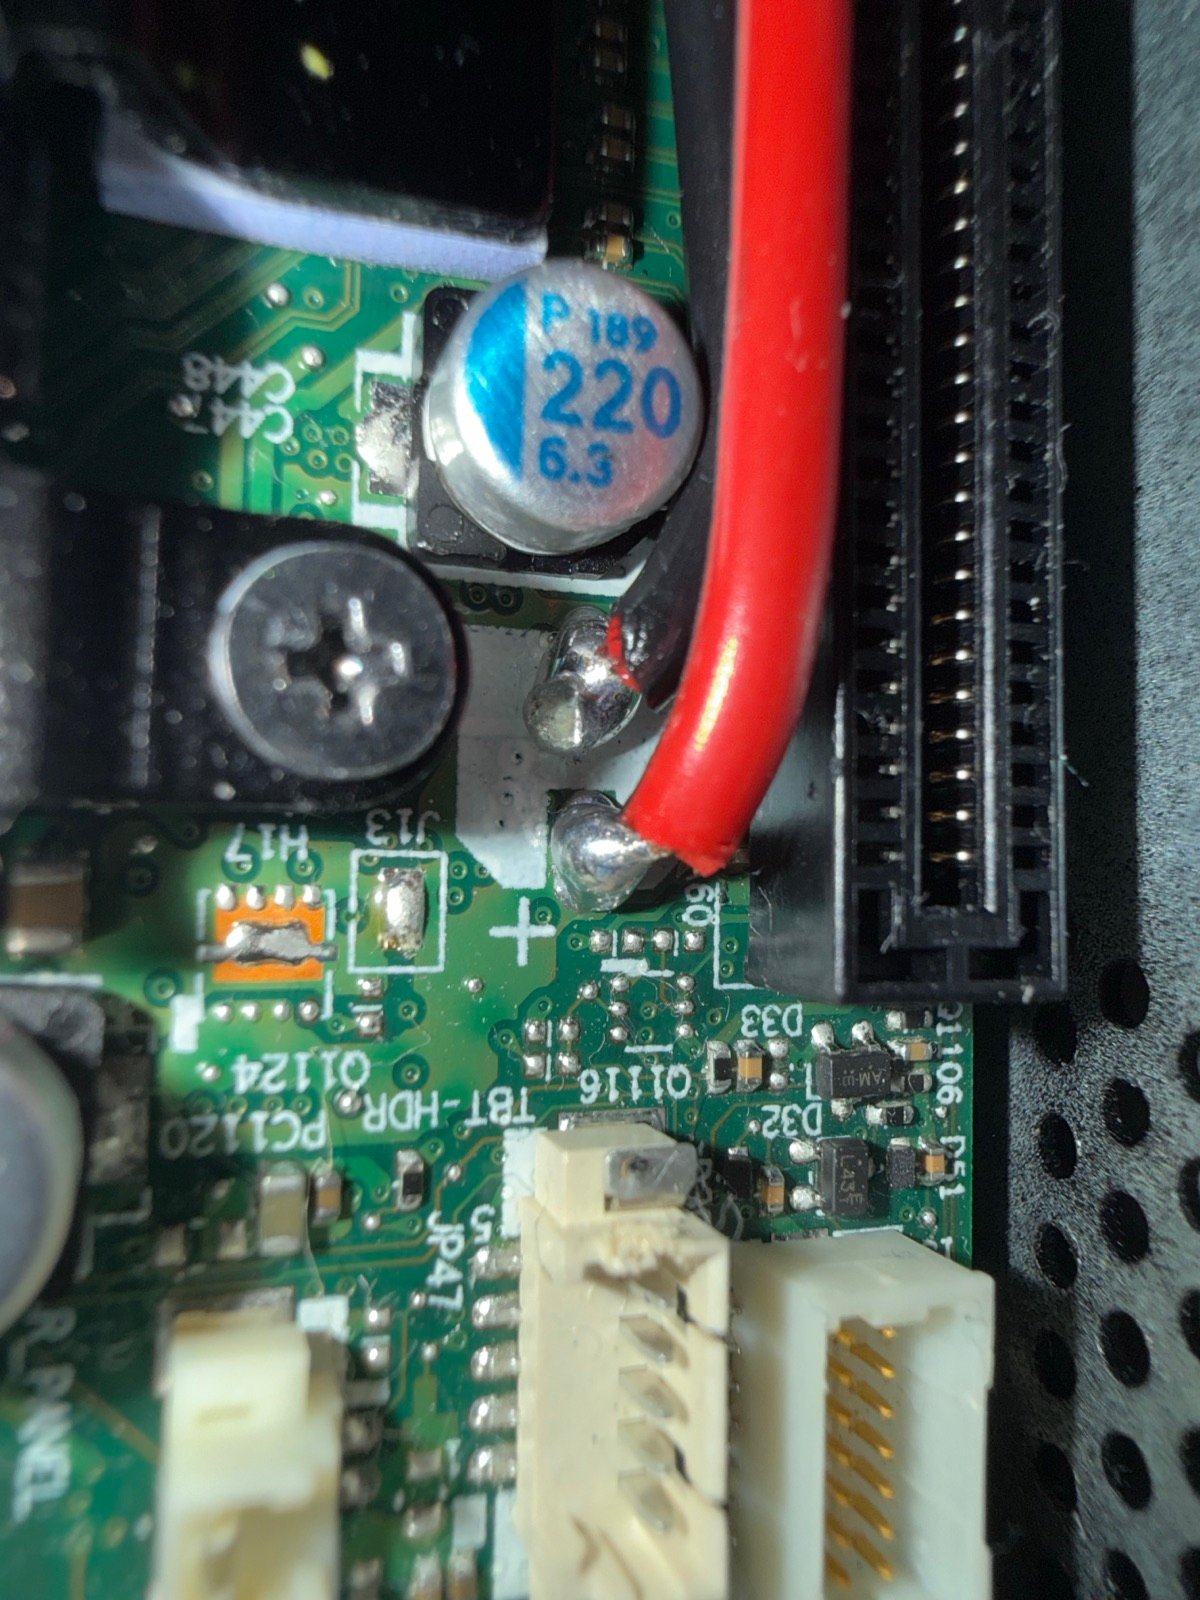
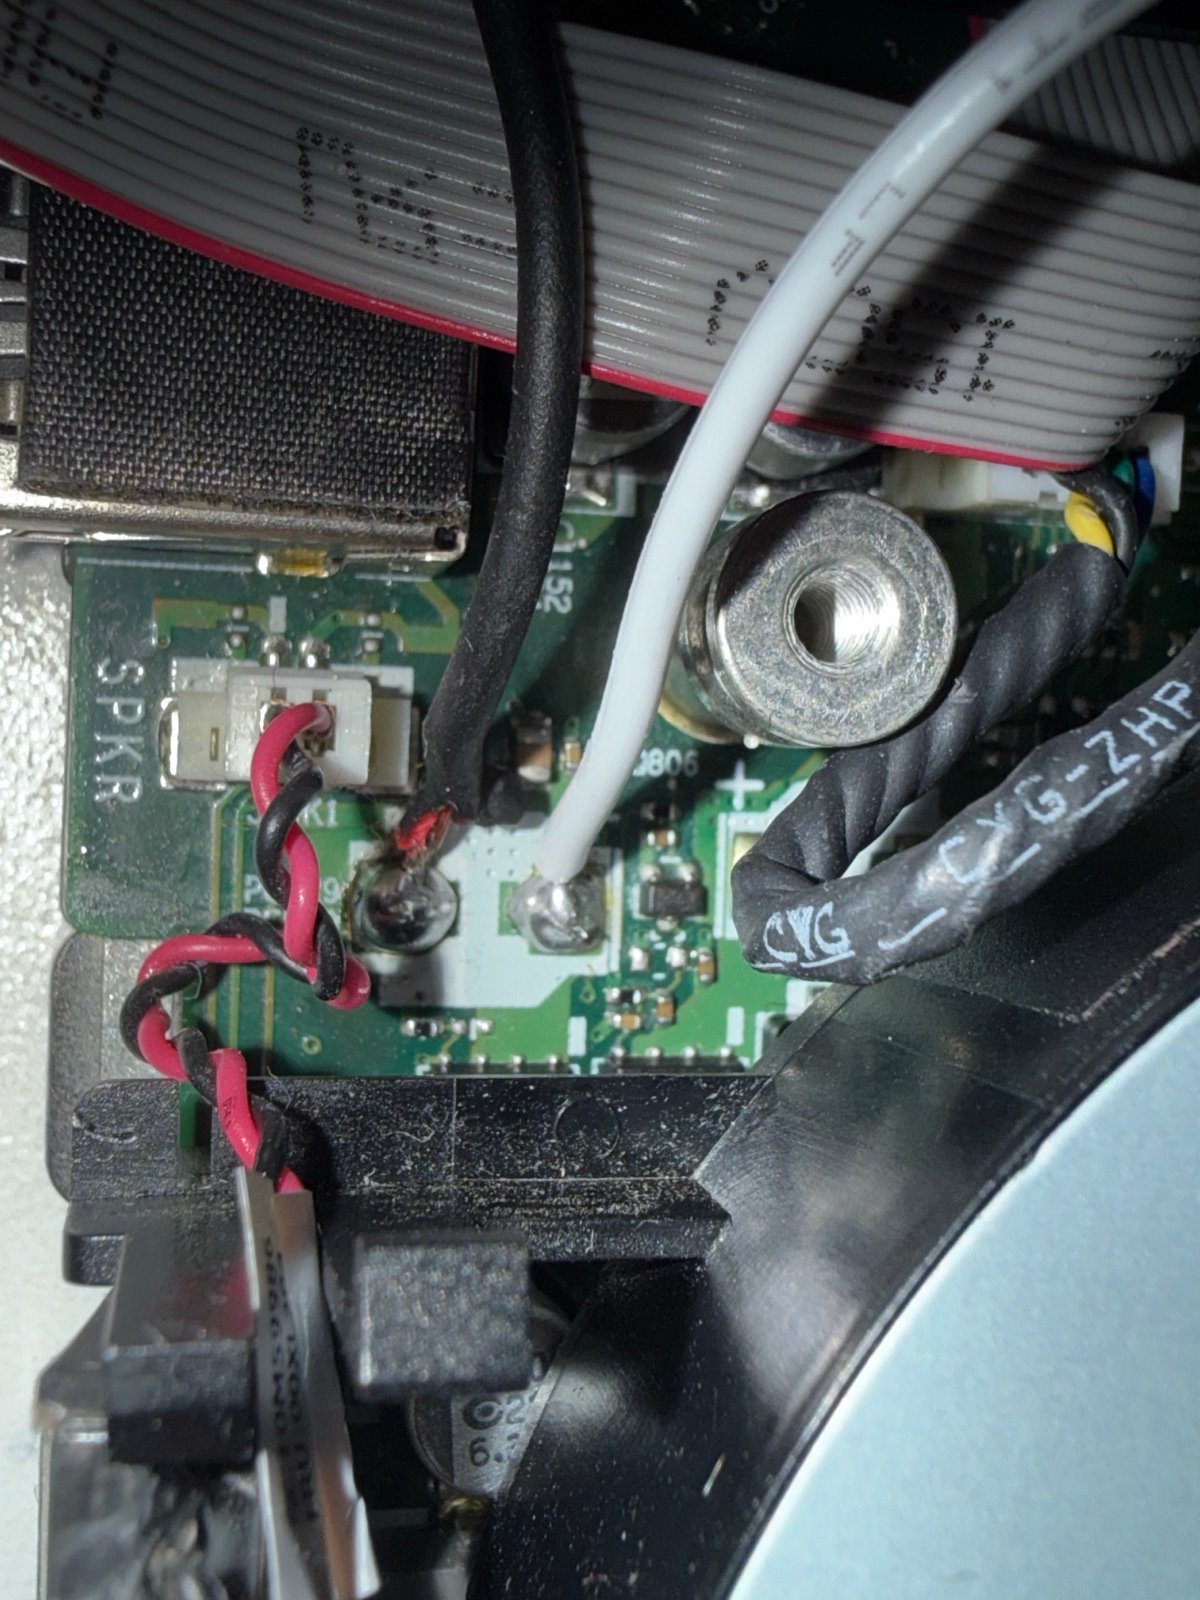
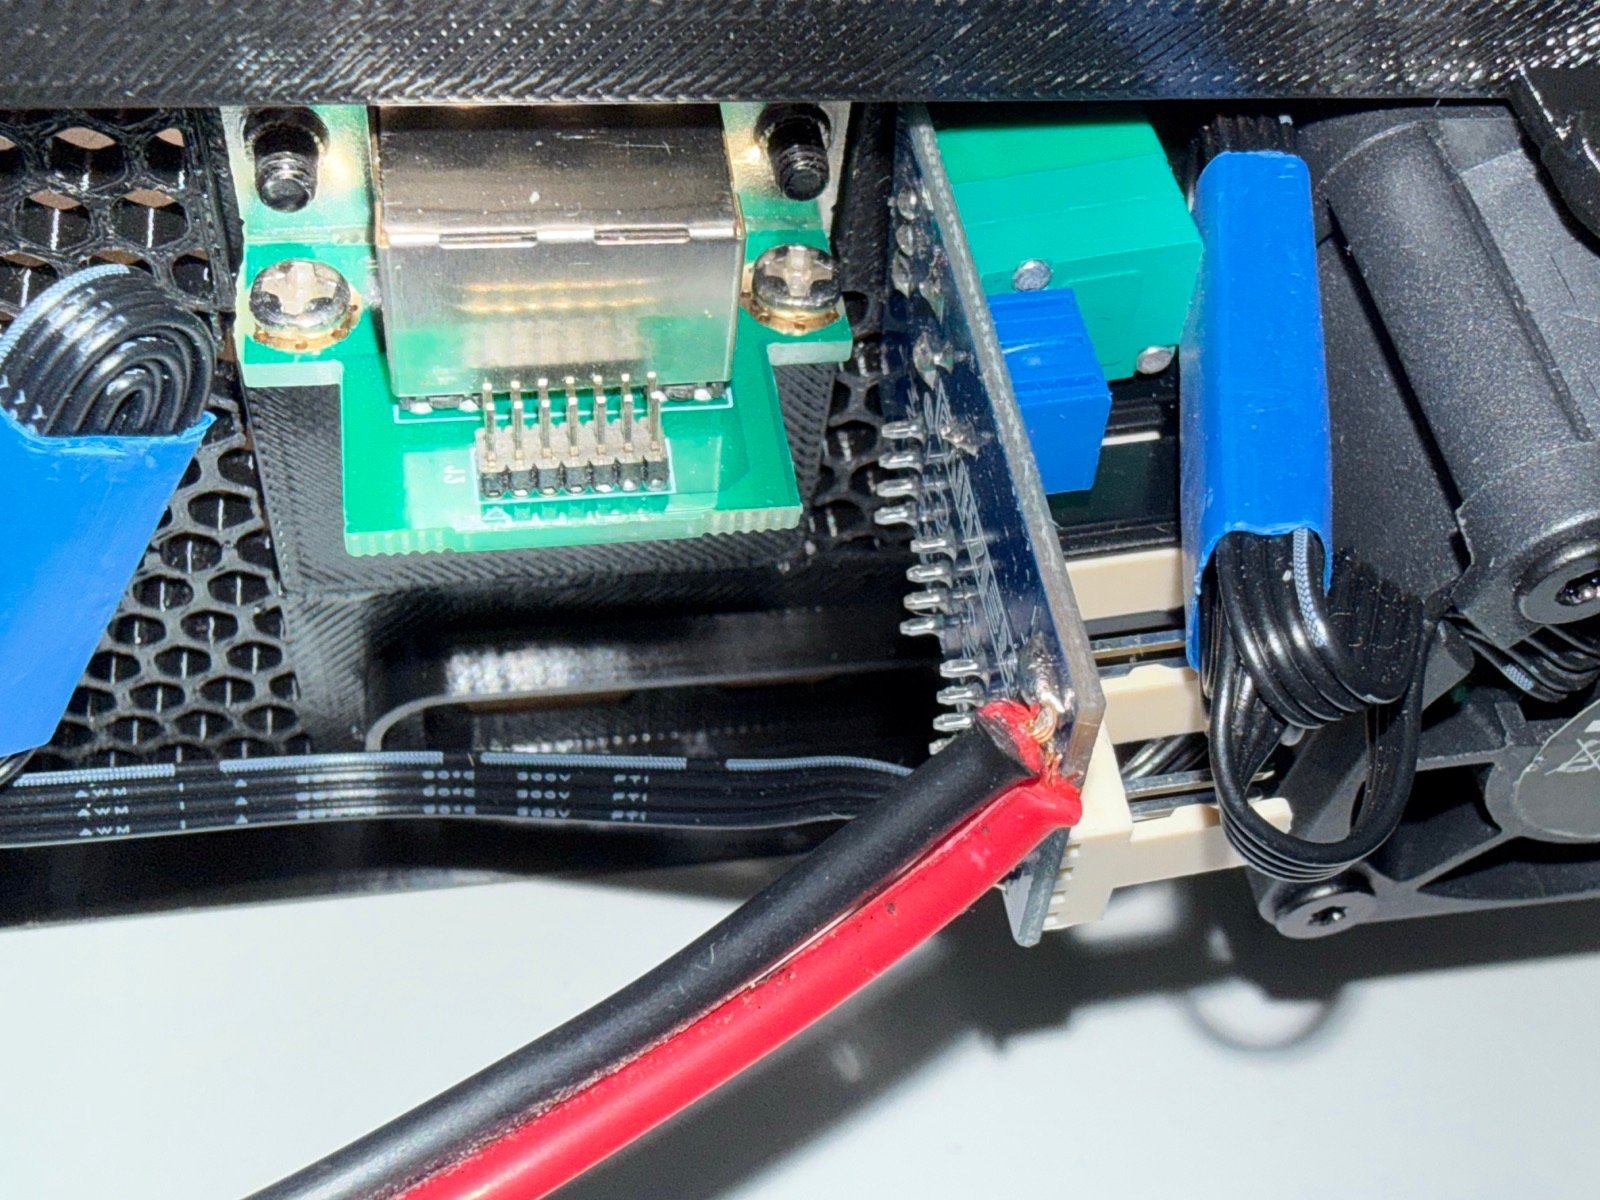
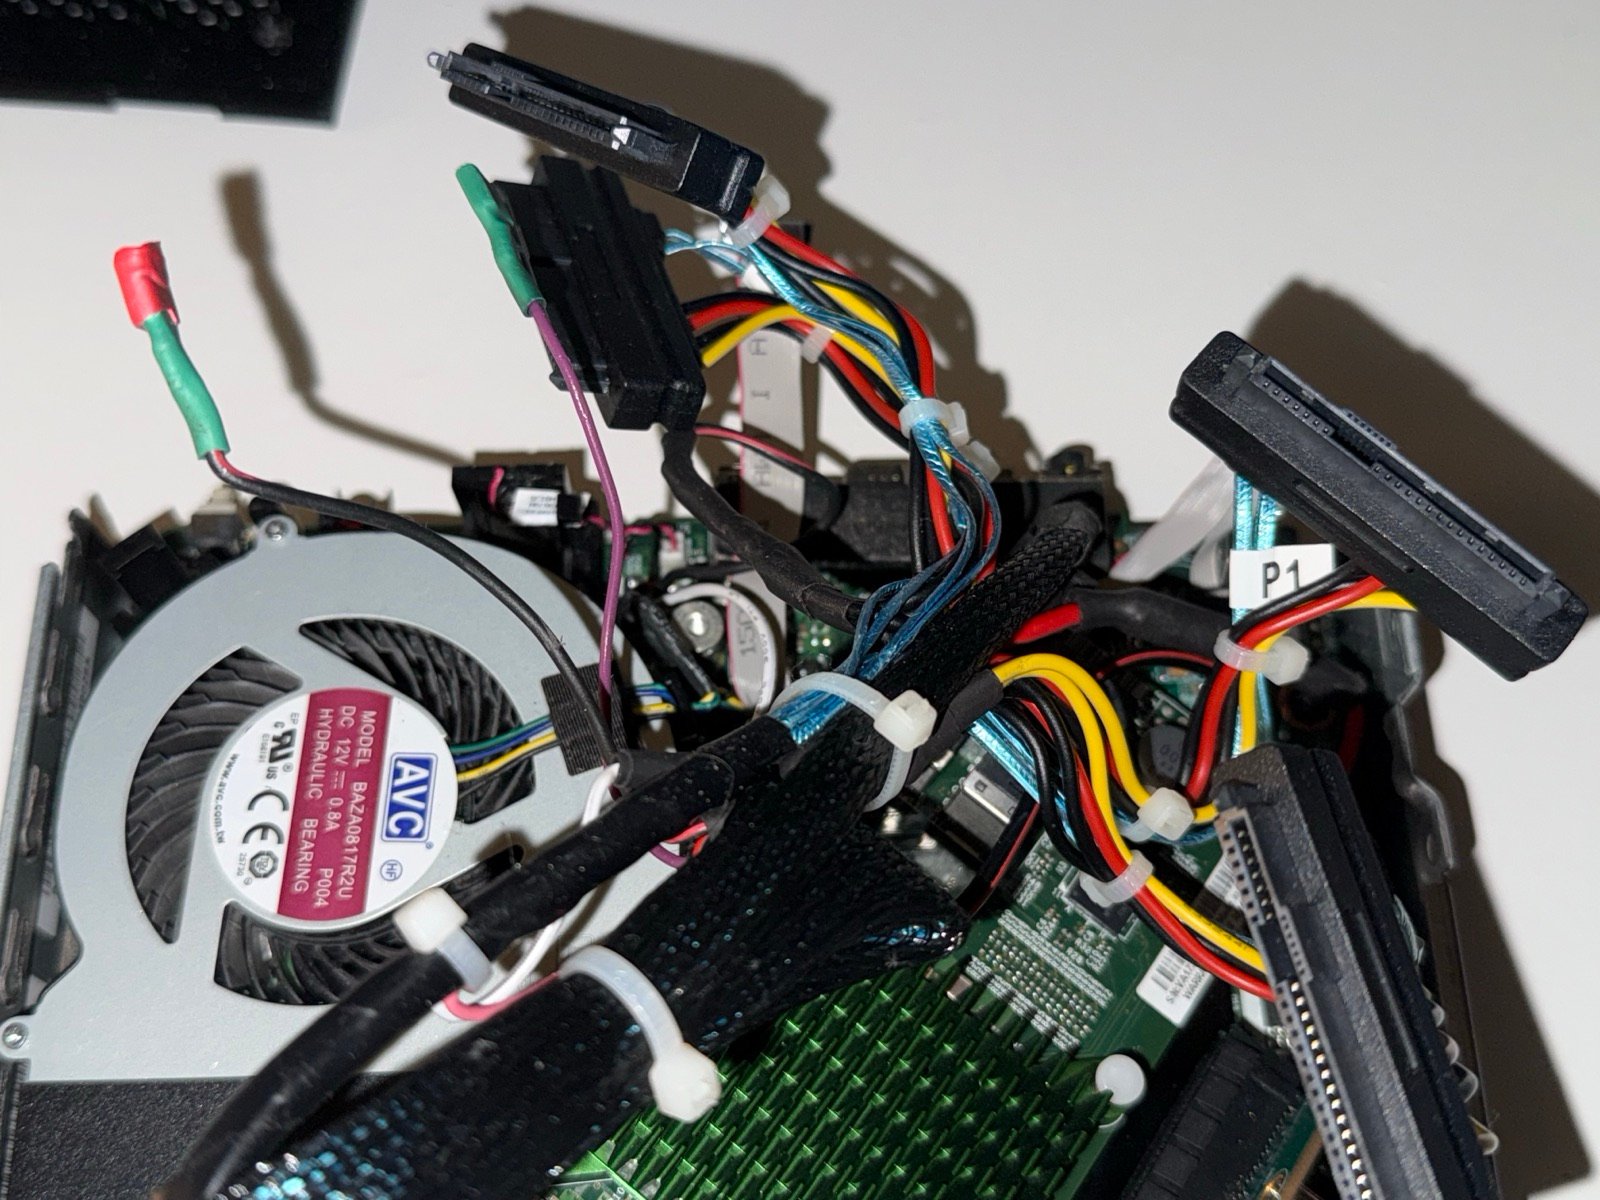
Solder wires to the motherboard power pins as shown in the pictures above (12v, 5v and Ground) and a recommended 5amp fuse inline with the 12v wire in case the power draw is greater than 60W it can prevent any damaged components. These wires will power the fan speed controller and the SAS Drives.
South bridge radiator (optional)
If using the south bridge radiator, seat it on the chipset now — it's much easier to install before the riser and SAS card are in place.
Step 2 — Install the PCIe Riser & SAS Card
The Supermicro 9300-8i is a full-height PCIe card. The riser repositions it to fit inside the raised custom enclosure.
Connect the riser
Plug the PCIe riser ribbon into the M920x's PCIe x16 slot. Route the ribbon so it exits cleanly upward toward the new enclosure height.
Mount the SAS card on the bracket
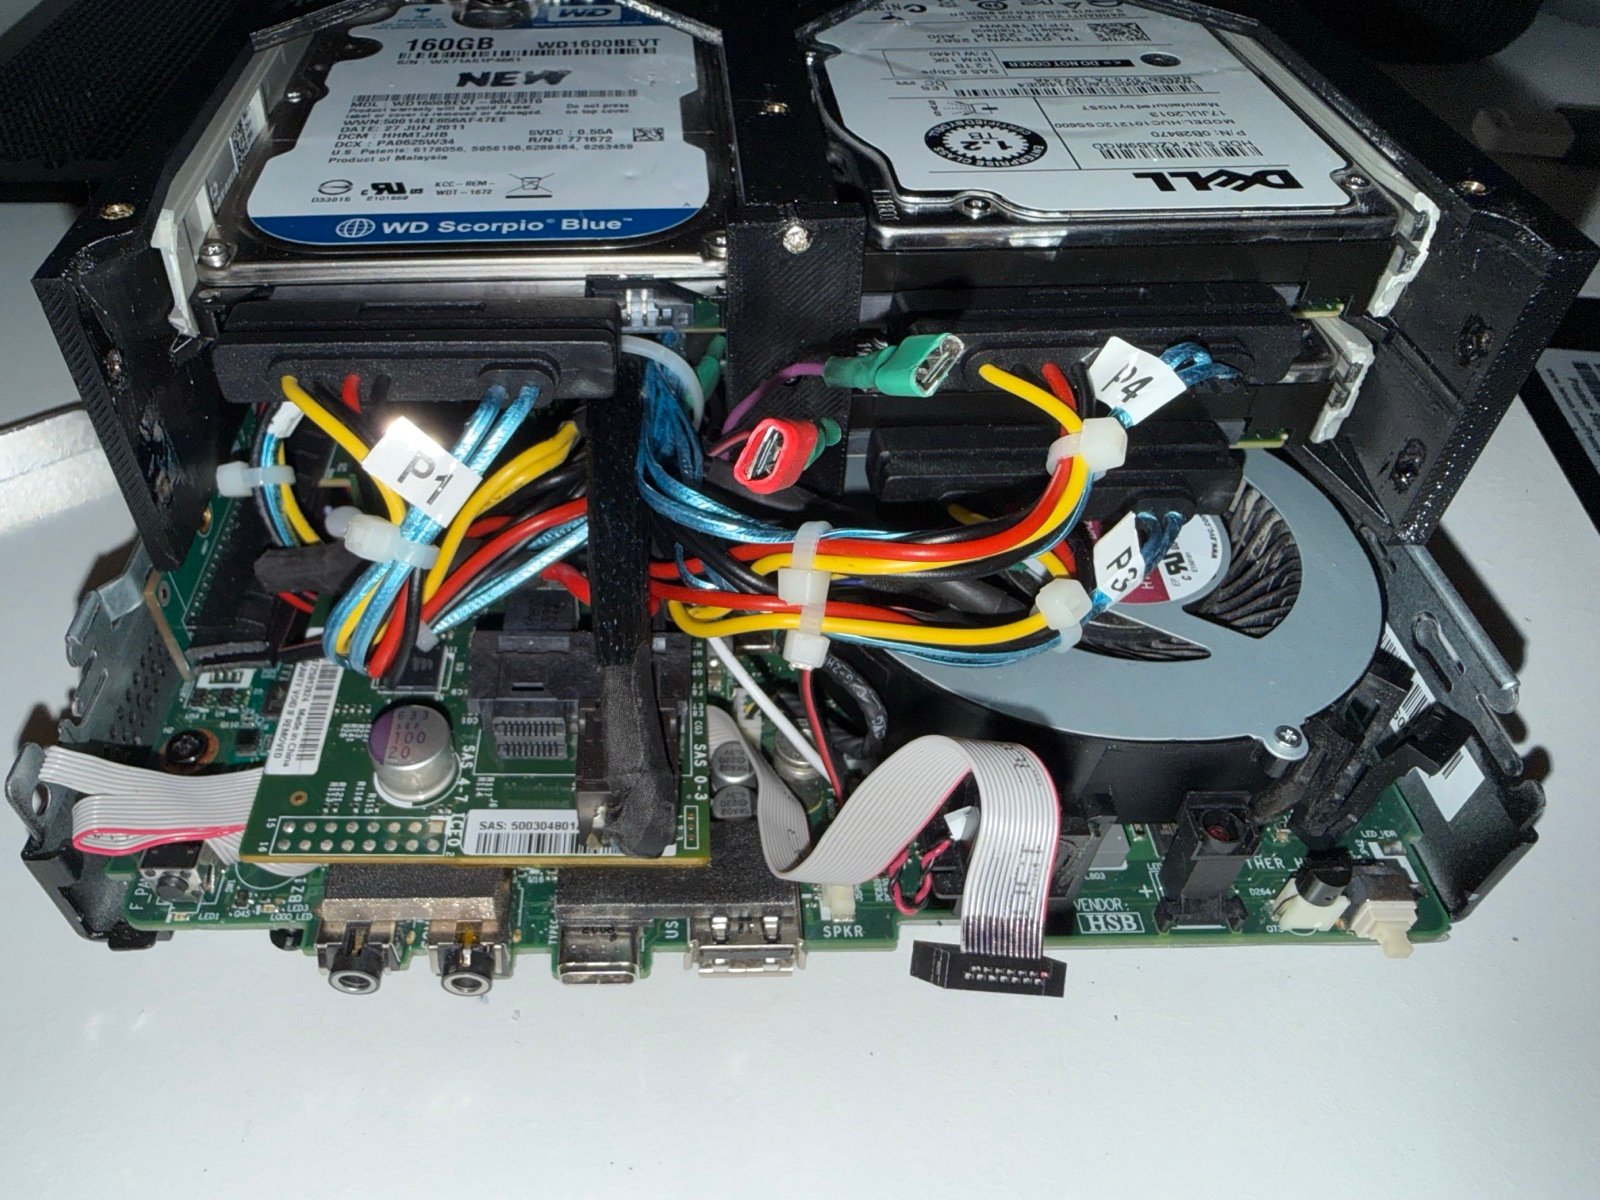
Attach the Supermicro 9300-8i to the 3D-printed SAS bracket using M3 30mm screws. Position the bracket inside the chassis so the card aligns with the riser ribbon, then plug it in.
Step 3 — Wire the Drive Caddies
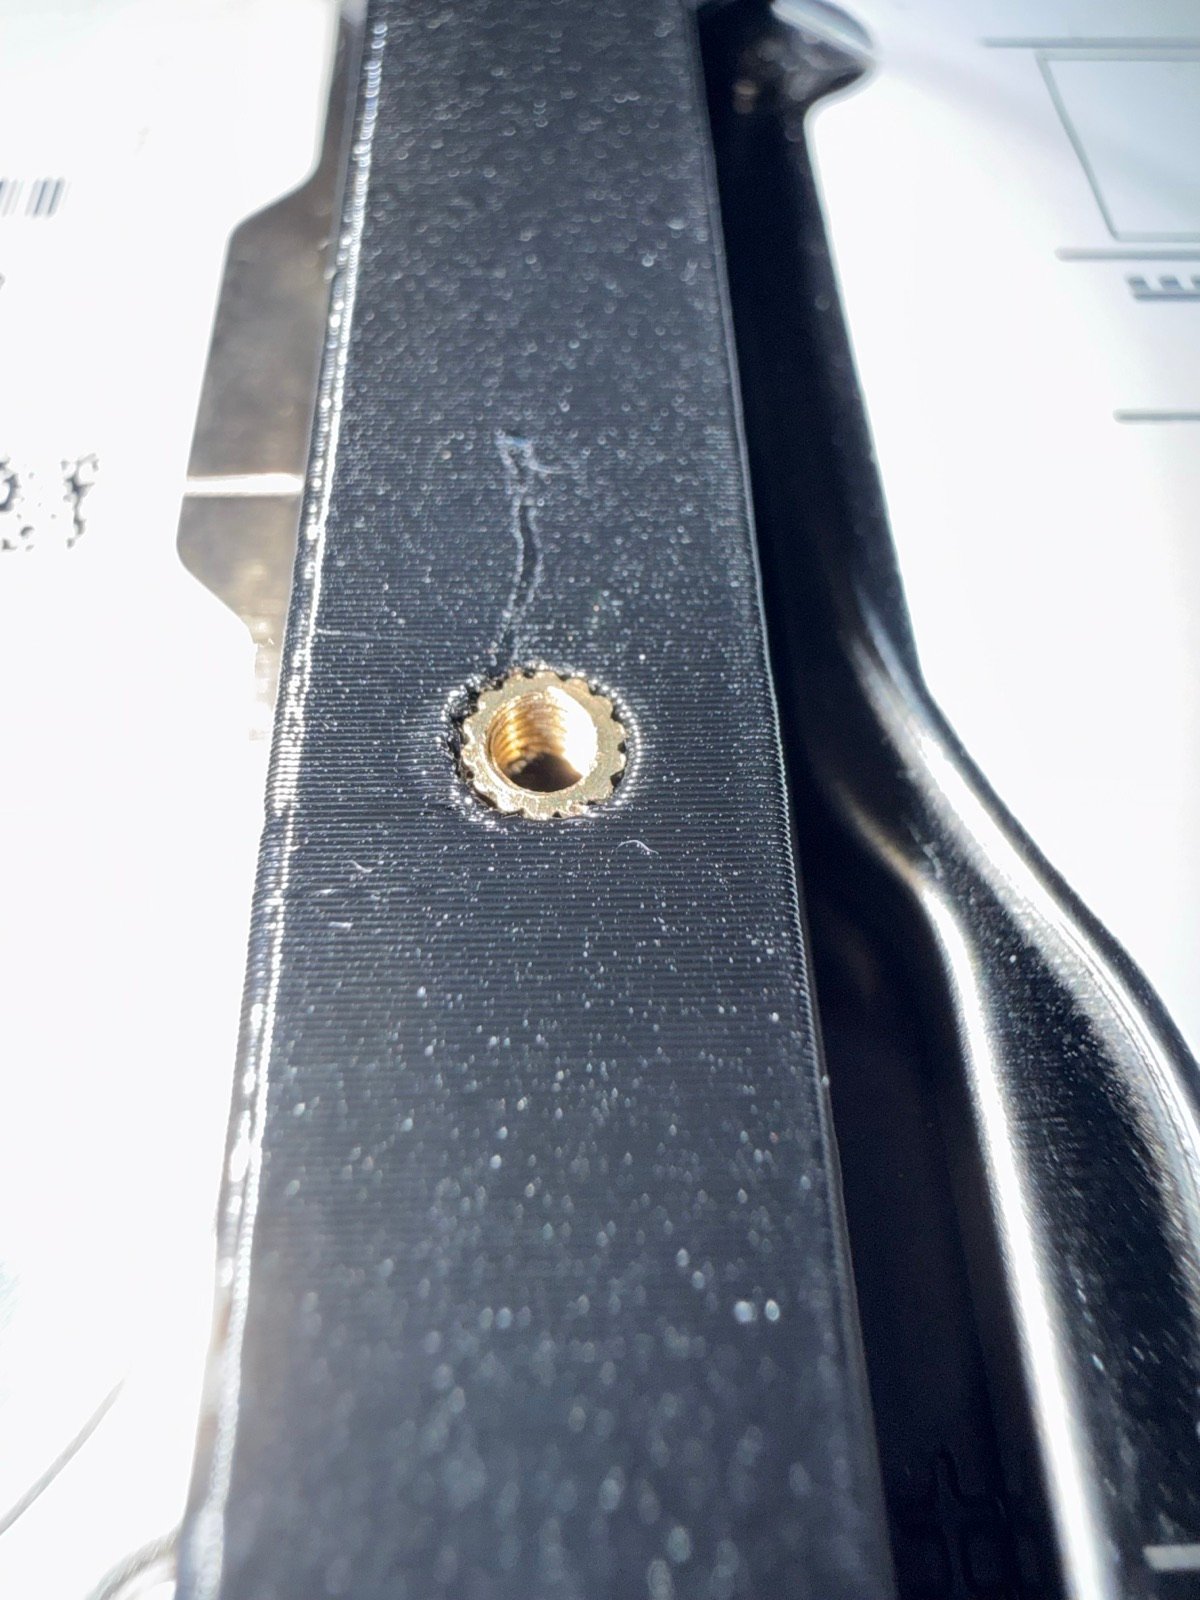
Connect the Mini SAS data cable from the 9300-8i's SFF-8087 port to the drive caddies' backplane. Route the cable so it clears the fans and doesn't press on any PCB components. Use locking screws and bolts to anchor cables to the enclosure frame.
Terminate the power wiring
Use wire connector tips and heat shrink tubing to cleanly terminate all power runs to the drive caddies. If adding fuses, inline a fast-blow glass fuse on the 12V line feeding the caddies — this protects the mainboard from a short in the drive bay wiring.
Step 4 — Assemble the Custom Enclosure
With all internal components installed, attach the 3D-printed parts to close the build.
Attach the side panels and top shell
Start with the CPU side panel and PCIe side panel — these attach to the mainboard tray and chassis rails with M3 screws. Lower the top shell over the assembly aligning all screw holes, then attach the front panel last.
Install the Arctic fans
Mount the Arctic fans into the ventilation positions on the side panels. Connect fan headers to the mainboard — the M920x chassis fan header supports PWM speed control via BIOS.
Step 5 — Install TrueNAS Community Edition
TrueNAS Community Edition is the open-source, Linux-based NAS OS. It runs ZFS natively and has a full-featured web UI with SMB, NFS, iSCSI, and Docker app support.
Flash the installer and boot
Download the latest TrueNAS CE ISO from truenas.com and flash it to a USB drive using Balena Etcher or Rufus. Boot the M920x from USB (F12 at startup for the boot menu) and select Install/Upgrade in the TrueNAS menu.
Run the installer
Choose a target drive for TrueNAS itself — use the NVMe or a small dedicated SSD, not one of your data drives. Set a strong root password and let the installer finish, then reboot and remove the USB.
Step 6 — Configure TrueNAS
After the first boot, TrueNAS displays its IP on the console. Open a browser on any machine on the same network and navigate to that IP.
Create a storage pool
Go to Storage → Create Pool. Name the pool, select your data drives, and choose a VDEV layout. With 3 drives, RAIDZ1 is the minimum for data protection (survives one drive failure). Add the pool — TrueNAS formats and initializes it automatically.
Create datasets and shares
Inside the pool, create datasets for each share type (media, backups, documents, etc.). Then go to Shares → Windows (SMB) and add shares pointing at those datasets. TrueNAS handles permissions and network discovery automatically.
Conclusion
You now have a compact, capable NAS built from a Lenovo M920x Tiny — with 12Gbps SAS connectivity, hot-swap 2.5" drive bays, 2.5G networking, and TrueNAS Community Edition managing your storage, all housed in a custom PETG-printed enclosure that replaces the stock top shell.
Total add-on hardware cost sits around $172 excluding the base machine, drives, and filament — well under the cost of a comparable purpose-built NAS. The M920x's low idle power draw (under 15W with drives spun down) keeps operating costs minimal for a 24/7 machine.